
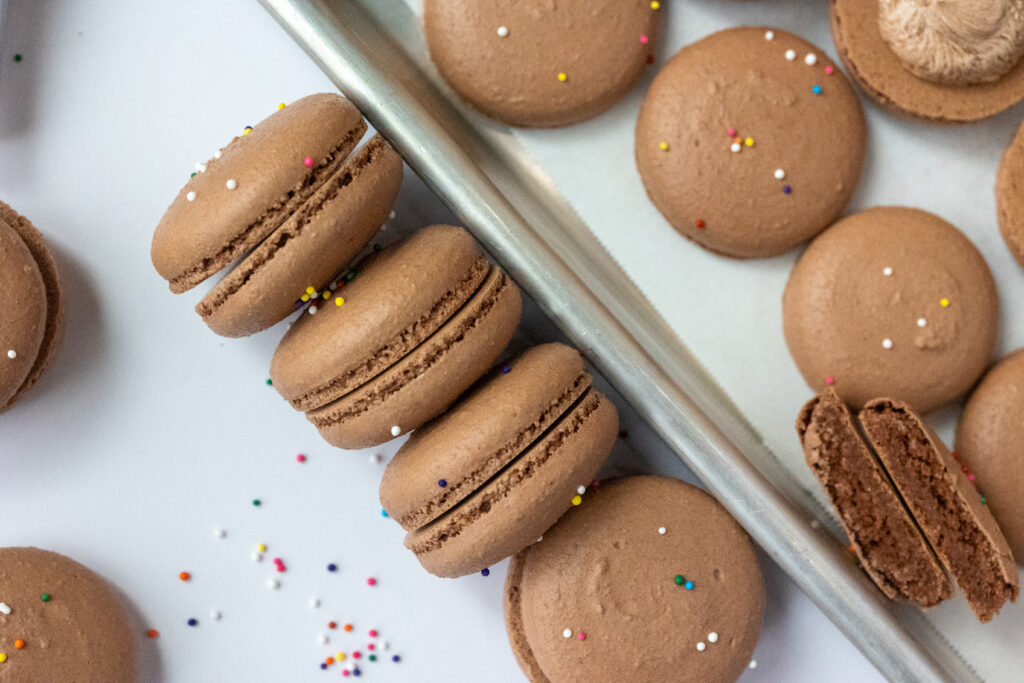
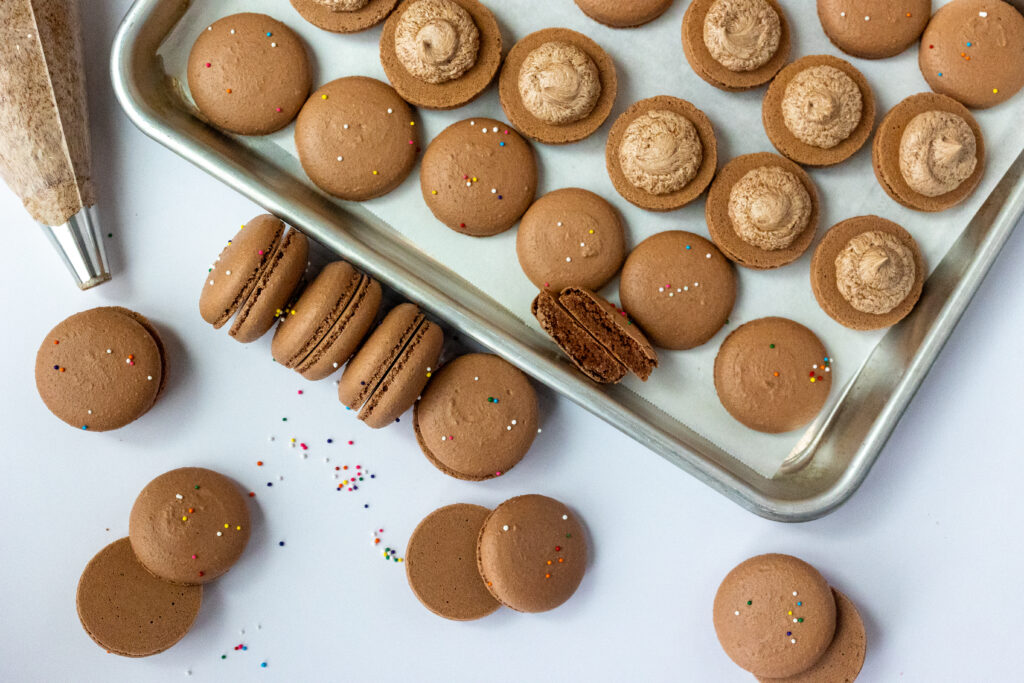
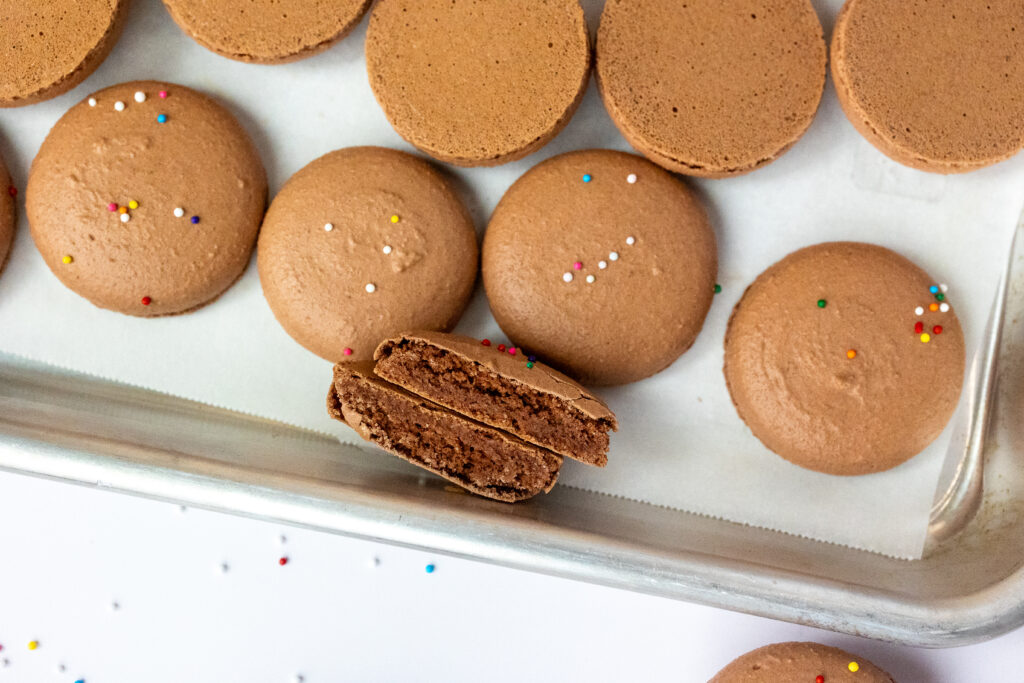
Once you’ve learned how to make macarons it’s inevitable that you’ll be ready to try your hand at chocolate macarons. These chocolate no rest French macaron shells are a staple for any macaron baker. They’re quick (as a macaron can be), and the shells are so full and delicious.
Tools you’ll need
To make the chocolate no rest French macaron shells you’ll need a mixer with a whisk attachment, sifter, kitchen scale, baking pans with mats or parchment paper, oven thermometer, and a wilton tip number 12. Sprinkles are always optional but a super fun addition.
Notes about the chocolate shells
If this is the first time you’re making macarons I suggest you read through my whole post on my no rest French macaron shell recipe post. This chocolate no rest macaron shell recipe follows that but makes some substitutions to add a chocolate flavor. There are in depth process photos on that post about how your meringue and batter should look and feel. It is important you follow the ingredients and even brands given in a macaron shell recipe because the chemical makeup of a macaron is quite particular.
Something worth noting is that with a chocolate shell you’re adding fat into the mix which can destabilize your meringue. I like to let my meringue get ever so slightly stiffer than usual for some extra stability. You can let it mix for about 1 minute longer, making sure to not let the meringue get all the way to shaving cream thickness but just before.
You can add about 2 drops of brown food gel color to make the color deeper brown. There are many macaron bakers who prefer to not add chocolate to their shells and only flavor shells with the filling. It’s a perfectly acceptable way to make chocolate macarons.
Don’t let the length of instructions intimidate you. They are in-depth, once you’ve made them a couple of times you’ll realize it’s not as difficult as it looks. They’re just cookies, so have fun and enjoy them!
If you make these or any of my other recipes I would love to see, tag or message me on social media.
If you’re a huge chocolate fan you may also be interested in my chocolate classic cake with faux Swiss meringue buttercream. In fact, that’s the buttercream I used to filled these shells with. Enjoy!

Chocolate no rest French macaron shells
Equipment
- mixer with whisk attachment
- silicone baking mat or parchment
- aluminum baking trays
- sifter
- spatula
- kitchen scale
- oven thermometer
- piping bag with nozzle
Ingredients
- 120 g egg whites straight from the fridge is ok
- 115 g granulated sugar
- 5 g egg white powder
- 175 g confectioners sugar
- 175 g almond flour Blue Diamond or Kirkland brand is best
- 20 g Hersheys cocoa powder other brands have too much fat
- 2 drops brown food color gel optional
Instructions
Making the meringue
- Preheat your oven to 305 degrees, you must use an oven thermometer for this.*
- In a bowl combine your granulated sugar and egg white powder and stir so that it is combined totally, we do this so the egg white powder doesn't clump when added in the liquid egg white.
- Measure out your egg whites and put them into your mixer bowl. I like to use the two bowl method to prevent having to waste other eggs if a yolk breaks, the fat from the yolk will ruin meringue. Crack one in a separate bowl, if there are no issues put it in the mixer bowl to be weighed. Then repeat.**
- Add the sugar mixture to the egg whites and get your mixer ready with the whisk attachment.
- Start your mixer on the lowest setting and give it about 10 seconds, you're going to do about 10 seconds at each setting until you hit 6 or medium high and then you will let it go until it's ready. In my environment it usually takes me about 6 minutes.
- We stop it when it is at stiff peaks, we do not go past the peaks stage to the shaving cream phase. For chocolate shells I like to make the meringue a small amount stiffer for added stability. I let my meringue whip about 1 extra minute (in my kitchen it's about 7 minutes instead of my usual 6), making sure my meringue doesn't get to the shaving cream stage.
- When you detach your whisk and circle it around in the meringue you will feel slight resistance, when you pull it up from that circle it will pull and make a peak, when you flip that whisk straight up, the peak will curl over.
- While your meringue is working in the mixer, weigh and sift your almond flour, confectioners sugar, and cocoa powder. Do not force ingredients though the sifter. Do not skip sifting especially for the cocoa powder.
Macaronage
- When the meringue is ready, remove the bowl from the mixer and add all of the dry ingredients in. Start moving the dry ingredients around to incorporate it some. Don't worry about the meringue, it will be fine. Once it's a little more manageable, (this is where I like to add gel color drops if I'm coloring it) I like to start spreading it on the sides of the bowl, then take my spatula to collect it all back to the bottom center by taking the side of the spatula with pressure around the bowl and down, when my spatula is at the bottom center, I scoop upwards to see how well the batter is flowing. I repeat this process until the batter is ready. In the beginning stages, when the batter is spread on the side of the bowl, you can run your spatula back and forth over the batter to work out some air. Each time I spread my batter on the side of the bowl, I note the amount of (popped) air pockets that seem to be present. It will decrease as you go. The batter is ready when the air pockets are reduced to few (some are ok we don't want it totally deflated) and when the batter is able to flow off the spatula after a circle and scoop mentioned above. This batter is very thick and will not become runny like a traditional rest recipe. It will not flow like lava, so do not over macaranage tying to get it like a traditional macaron.
- Bag the batter into either 1 large piping bag, or 2 medium with a nozzle of your choice***
Piping the shells
- Place your silicone mat on your upside down aluminum tray. Pipe one tray at a time. I usually start piping my second tray when the first has about 6 minutes left. Begin piping by placing your bag straight up and down, a 90 degree angle from the pan. To end piping, keeping your nozzle at about the same angle, you'll want to make a quick swirl. If you notice that you've made a nipple or unsmooth section, after piping a few, set you bag down and work them smooth using a toothpick, don't wait until you've piped the whole tray because the tops do dry out a bit and it is much harder to fix later. My mats have 3 circle outlines, I like to pipe just past the second, almost to the 3rd circle. You can manipulate how tall or flat the shells are to an extent with how you pipe it, you will get a feel for that as you go.
- Once they're all piped you can tap the bottom of the tray or drop it on the counter a few times to work air out and smooth those little holes over with a toothpick. If all the steps above were just right there will be very few that you need to fix.
Baking the shells
- Check your oven temp, if it's ready you can place them in the oven. I plan to bake mine at 305 for 14 min. I check my oven temp throughout. It usually fluctuates between 295-310 throughout and it takes 14-15 min in my oven.*
- Watch them inside the oven, around half way though they start to puff up and get feet, then towards the end the feet will start to shorten. I like to check for doneness a few minutes before my timer so that they don't over bake (every tray can be slightly different). I check with he wiggle test. Carefully open the oven, gently tap the side of the top part of the shell, if it moves easily it needs more time. I consider my tray done perfect if a shell on the outside of the tray does not wiggle at all, but a shell on the inside has a tiny wiggle.
- When they are done remove them and set them on a cooling rack for a few minutes. Then carefully remove the pan leaving them to cool completely on the silicone mat, on the rack.
- Once they are totally cool, you can remove them. They should release very easily. Especially the outside of the mat. If the ones on the inside have a slight stick, I find it best to bend the silicone mat to help it peel away. If they are sticking to the mat, they are undercooked and you should increase your cook time next time.
- Fill them and let them mature in an airtight container in the fridge. I sometimes have a small gap that fills in once they have matured in the fridge by absorbing some liquid from the filling. A small gap is not the same thing as a hollow and is totally acceptable in a macaron.

Leave a Reply