
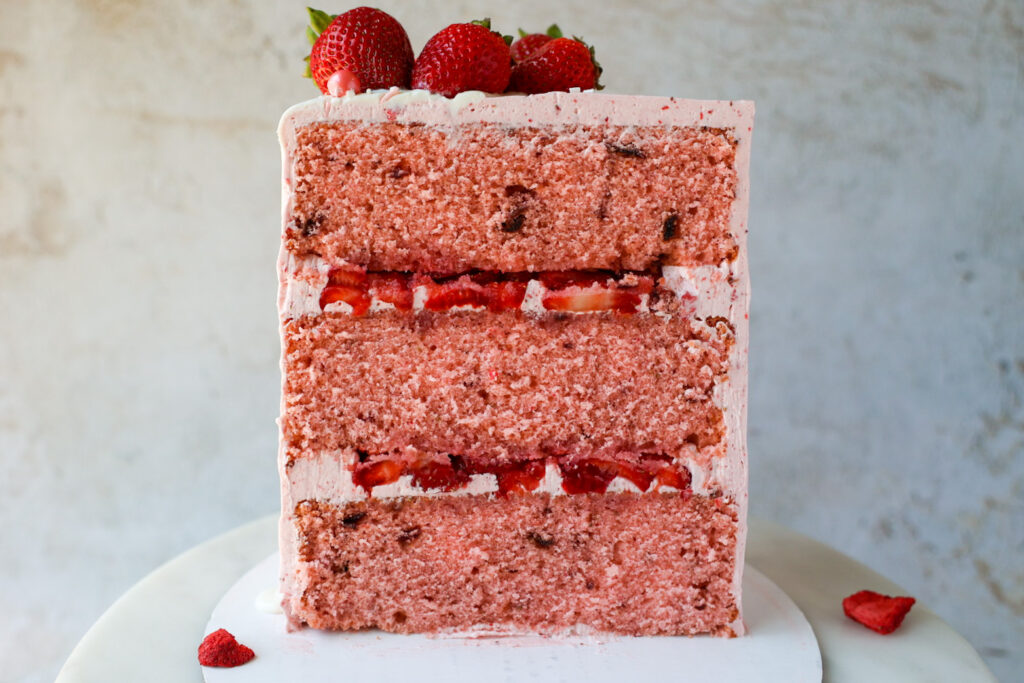
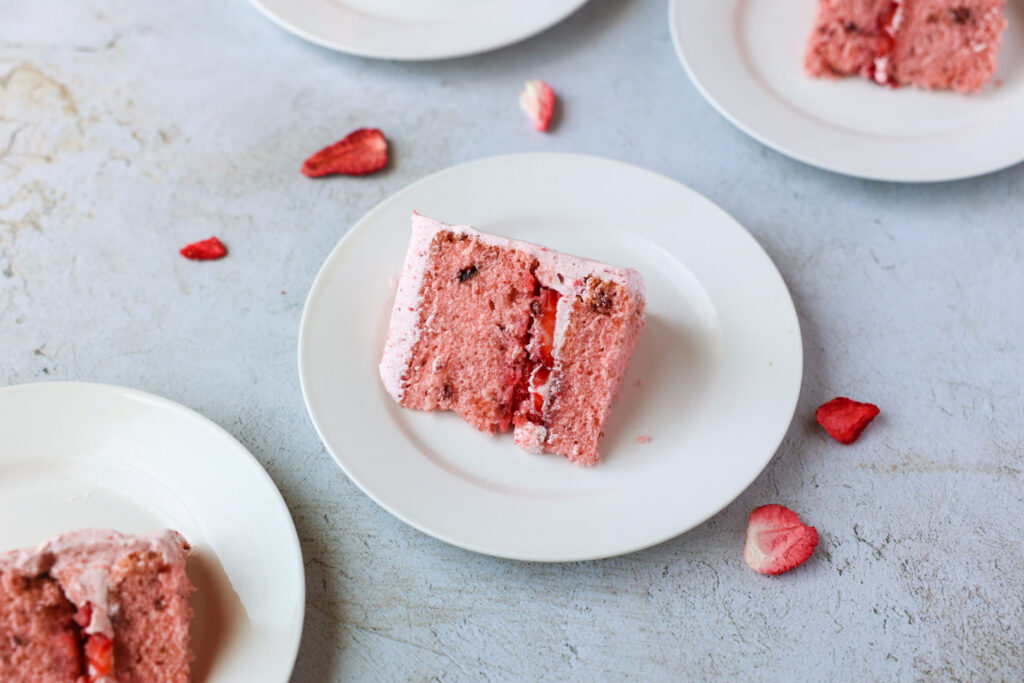
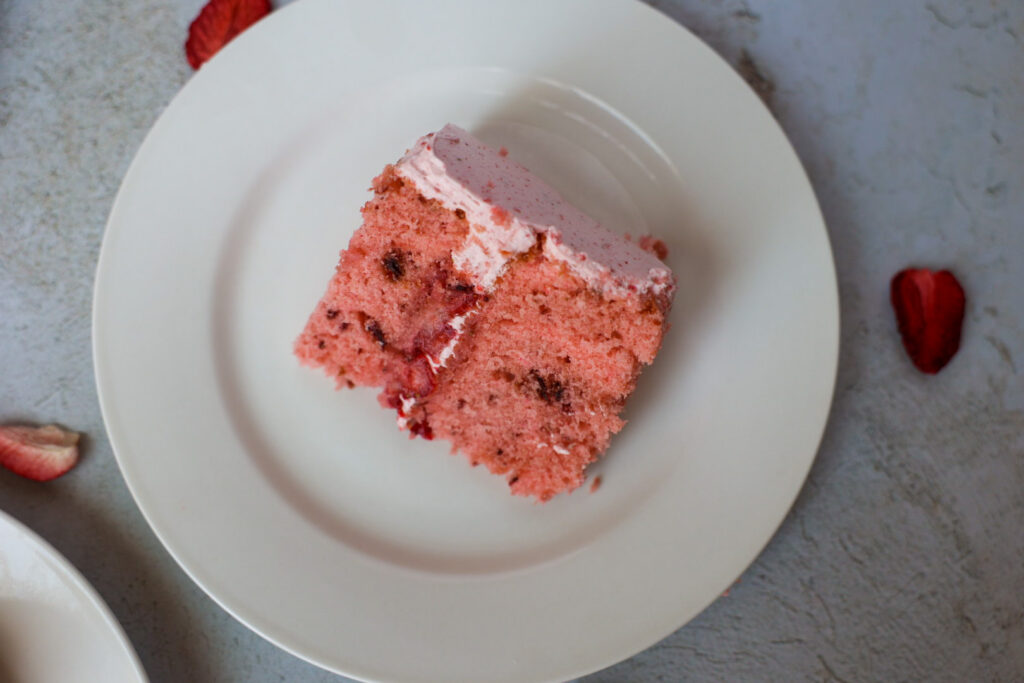
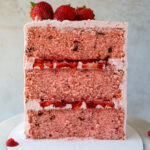
This sweet cake has juicy strawberries between layers of pink cake with strawberry bits in the batter and a smooth buttercream with flecks of dried strawberries throughout.
Tools to make the Cake
You’ll need a mixer with whisk and paddle attachments, a sifter to sift your powdered sugar, 6 inch cake pans, cooking spray, a bowl, baking foil, parchment paper, and a scale. You’ll also want some sort of cake board. I usually like to go one size bigger than what I’m making. You can get these at Walmart or craft stores. A cake turn table is helpful, some people even use a lazy Susan. I always use an offset spatula and bench scraper while decorating.
To make the Cake Layers
To make the cake layers I used the reverse creaming method. You can read more about why I do this if you’re interested in my standard cake recipe. I decided to add a few drops of soft pink gel coloring, this is just for cosmetics and not necessary. Then I took a 1 oz bag of freeze dried strawberries, crushed it up in the bag leaving some pieces a little bigger and stirred that in. I used about 16 oz of batter in each 6 inch pan.
For the strawberry filling
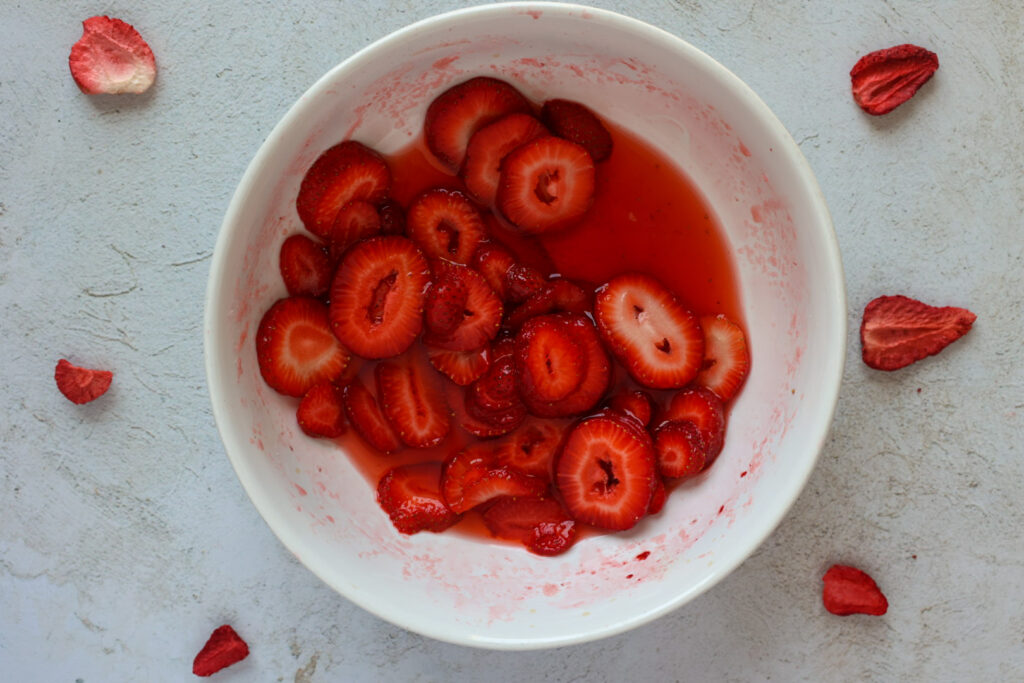
This is super simple but so so delicious. It’s just 10 sliced up strawberries with sugar and a little vanilla. Once you stir it up and let it sit for a bit it releases the juices and they become tender and so sweet.
For the Strawberry Buttercream
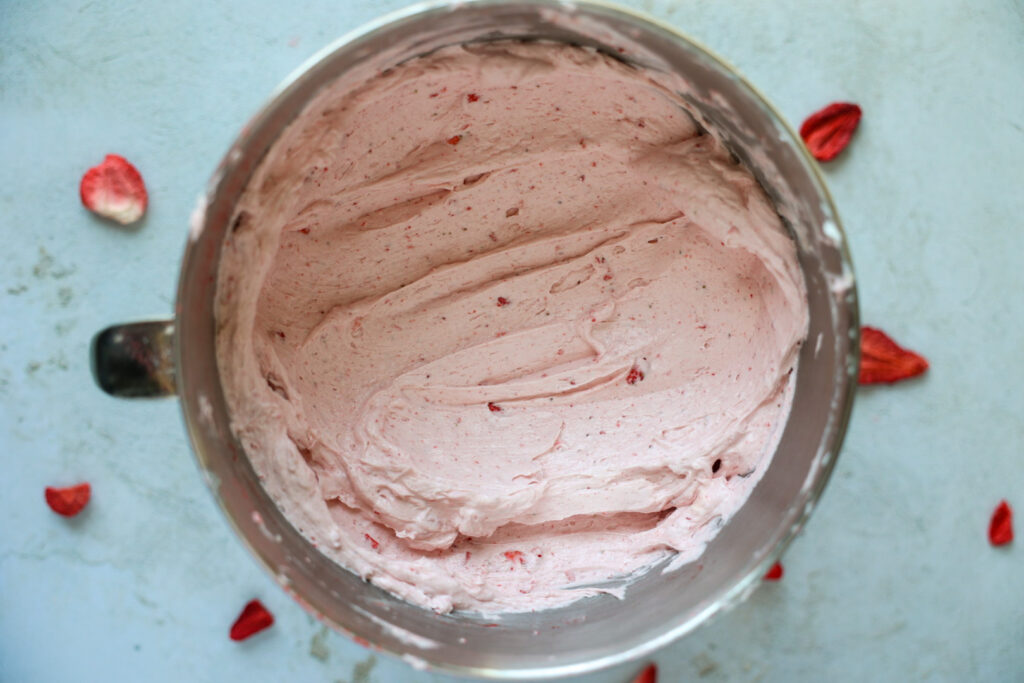
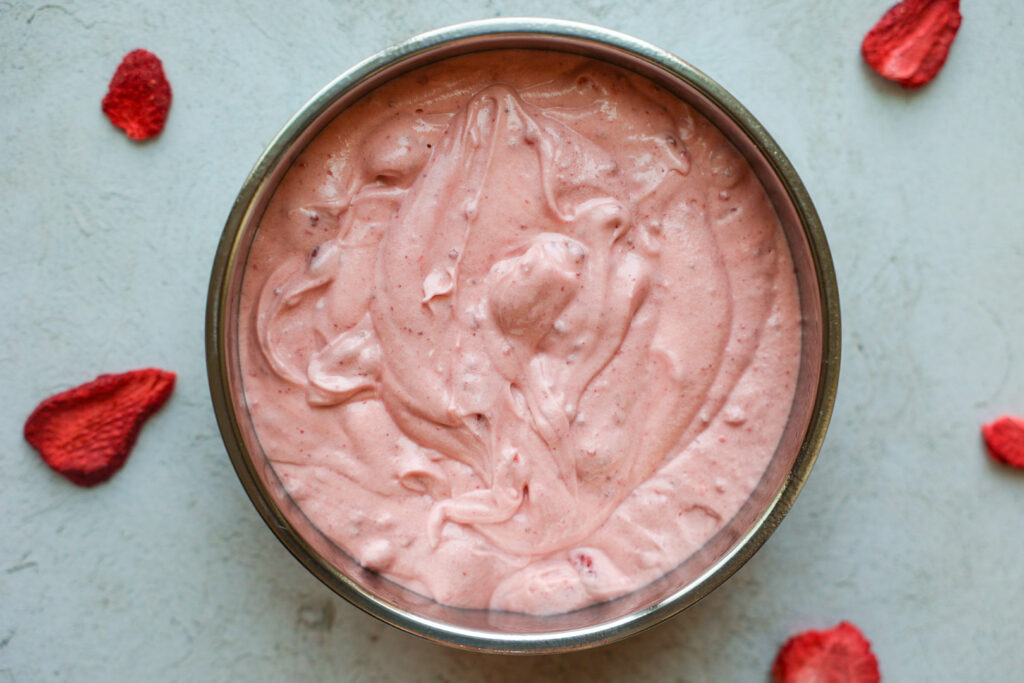
The base of this recipe is my faux Swiss meringue buttercream. It has some strawberry extract added and finely crushed up freeze dried strawberries. The flecks from the strawberries are super adorable. You can add a little more of the soft pink gel coloring if you like the look of it.
For the Assembly of the Cake
To stack and crumb coat the cake put a dab of buttercream on your cake board and place your first cake upside down. You can spoon over some of the juices from the strawberry mixture on the cake if you desire. Add a thin layer of buttercream and smooth that out. Pipe a ring around the edge of the cake to create a barrier for your filling. Put half of the strawberry mixture in the well and flatten it out a bit with your spoon. Repeat with the other layer, and crumb coat the whole cake. Place it in the refrigerator for about 15-20 minutes until it is firm.
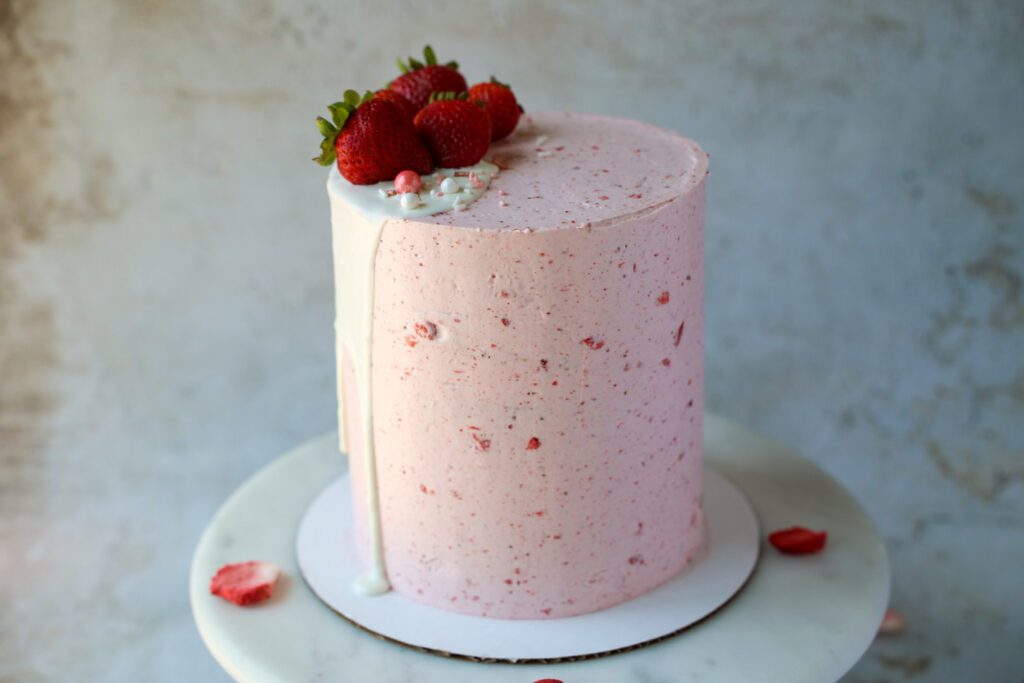
Once it’s firm You can make your final coat. Fill any buttercream holes and just keep smoothing until it is how you like it. Once you’re happy with it you’ll put it in the refrigerator and give it plenty of time to get nice and cold.

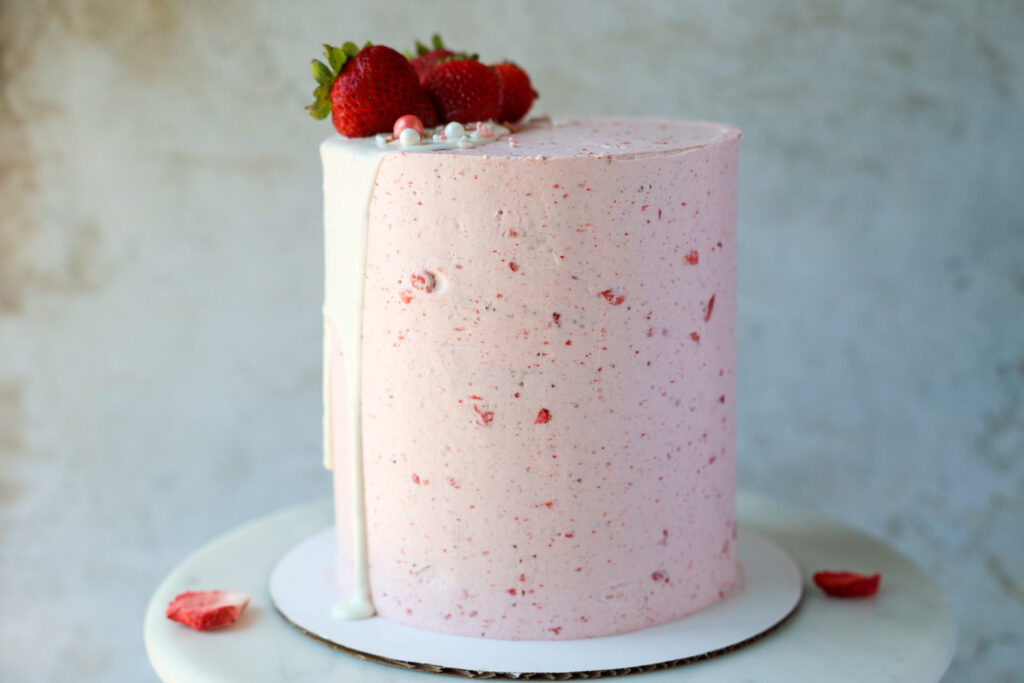
I chose to put a partial drip with some strawberries and a few sprinkles on the top. If you wish to do the drip melt 30 g bright white candy melts and 10 g heavy cream. Slowly stir to combine until melted. Wait for it to cool slightly so it won’t melt the buttercream. Pour it over part of the cold cake and push it over the sides. Set it in the fridge to firm up the ganache and finish the cake with berries and sprinkles if you desire.
Strawberry Dream Cake
Equipment
- mixer with paddle and whisk attachments
- 3, 6 inch cake pans
- bowls
- spatulas
- kitchen scale
- cooling rack
- oven thermometer
Ingredients
Cake Layers
- 325 g All purpose flour
- 1 tsp salt
- 2.5 tsp baking powder
- 475 g sugar
- 3/4 cups unsalted butter, softened
- 3 eggs, room temp
- 295 g buttermilk, room temp
- 1 tsp vanilla extract
- 2 tsp strawberry extract
- 1 oz package freeze dried strawberries
- 2-3 drops soft pink gel color, optional
Strawberry Filling
- 10 sliced fresh strawberries
- 1/4 cup sugar
- 1/2 tsp vanilla
Strawberry Buttercream
- 6 oz pasteurized carton egg whites
- 24 oz confectioners sugar
- 18 oz unsalted butter, softened
- 1 oz package freeze dried strawberries, crushed up finely
- 2 tsp strawberry extract
- 1 tsp vanilla extract
Instructions
For the Cake Layers
- Preheat the oven to 330 degrees.
- In a bowl combine buttermilk, eggs, and extracts. Mix to combine and break up the eggs.
- In the bowl of your mixer combine the flour, sugar, baking powder, and salt. Combine the mixture with the paddle attachment in your mixer to distribute the ingredients.
- Add the softened butter and allow that to mix making a coarse sand like texture, about 1 minute.
- With your mixer on low, add around half of your wet ingredients. You really just want to add enough liquid so that everything is a little wet without forming a dough texture, it should resemble cake batter. If you're adding color you can add it here, I added a few drops of soft pink. Then turn the mixer to medium and let it mix for 2 minutes. Set a timer and do not go over. This helps develop the structure of the cake, without over mixing.
- Scrape your bowl after the 2 minutes. With your mixer on low add the rest of the wet ingredents. Mix just until totally combined, about 15 seconds. Scrape the bowl again if needed.
- Mix in your crushed up freeze dried strawberries, I like to leave some a little bigger so they're visible in the cake layers.
- Prepare the pans by spraying with baking spray and lining the bottom with parchment paper.
- Divide the batter evenly between 3, 6 inch pans. I used 16 oz per 6 in pan.
- Cover the cakes with aluminum foil and bake for 60-70 minutes or until done.
- They are done once they start to pull away from the sides of the pan or a toothpick inserted in the center comes out clean.
- Allow the cakes to cool on a cooling rack until the pan is cool enough to touch.
- Remove the cakes from the pans and let them cool completely before wrapping in plastic wrap to freeze or to decorate.
Strawberry Filing
- Slice your strawberries in flat slices and add them to a bowl.
- Sprinkle sugar over them and toss to coat.
- Add the vanilla and toss again.
- Cover and set aside, the mixture will become juicy and sweet with some time.
For the Strawberry Swiss Meringue Buttercream
- Weigh out your egg whites in the bowl of your mixer. Sift your confectioners sugar into the bowl.
- Make sure your mixer has the whisk attachment on. Begin mixing it on low, slowly increasing it to high and let it go for about 6 minutes.
- Change out your whisk attachment for the paddle.
- Turn the mixer on low and add your butter in 1 stick at a time.
- Add your salt and flavoring and let the mixer go on low for about 10 minutes.
- Crush up your freeze dried strawberries and mix them in with your mixer or spatula.
For Assembly
- On a cake board, put a small dollop of buttercream and put the cake top side down on the board.
- If desired spoon some of the strawberry juices from the berry mixture over the cake layer.
- Smooth buttercream on the top. Pipe an additional rim around the outside of the cake to hold in where the strawberries will go.
- Put half of the stawberries in the well. Flatten them out so there aren't a lot of empty spaces. Add the next cake on top and repeat.
- Add the last cake layer, seal the sides and coat the whole cake in a thin layer of buttercream to lock in any crumbs. Refrigerate that for about 15 minutes before your final coat of buttercream.
- Add your final layer of buttercream, smooth and decorate it as you wish.
- I chose to put a partial white drip with 30 g bright white candy melts, 10 g heavy cream. Melt them in the microwave and slowly stir until smooth. It may need to be warmed again in 10 second increments until totally melted and smooth. Let it cool slightly so it does not melt the buttercream. Pour it on a top side of the cake and push it over the edge. Put it in the fridge to firm the ganache then finish with berries and sprinkles on top if you wish.

I CANNOT WAIT to try this recipe! Thank you for posting! I know it will be delish because everything I’ve made of yours is delish!
Thank you so much Mandi! That means a lot to me. I hope you like this one too!
Can I substitute the flour with cake flour? Will it make much of a difference?
Hi Jennifer, Ive never done it. This is what I found from a quick google search “When substituting all-purpose flour for cake flour, here’s the rule: Use 1 cup of all-purpose flour minus 2 tablespoons and be sure to sift it. Some sources recommend replacing the 2 tablespoons of removed flour with 2 tablespoons of cornstarch.”
I can’t wait to try this! I need to do a chocolate cake this month for my sons birthday. Do you have a recipe? Yours are so good! 🙂
hi Jamie!! Im working on it this week!!
Can this recipe be used for cupcakes?
Ive never used it for cupcakes but the base of my cakes is similar and many people have made them into cupcakes and loved it. Keep in mind I like a tight crumb to my cake in case that is not your preference.
Just made this cake yesterday and loved it! The recipe is perfect and amazing, and the cake is smooth and moist. Definitely making again!
When you say cover pans with aluminum foil do you mean around the sides or the top?
Just the top, it keeps even air circulation inside the pans
I’ve made this cake twice and it’s always well received! Took pictures but just realized there’s no way to post them.
Thanks for a perfect recipe!
Oh how wonderful! that makes me so happy. Thank you for sharing with me!